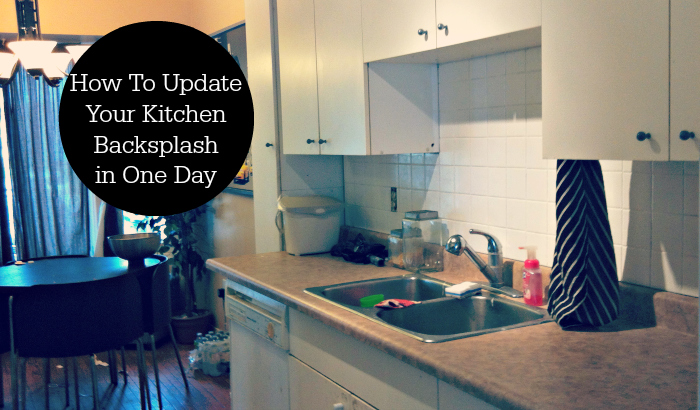
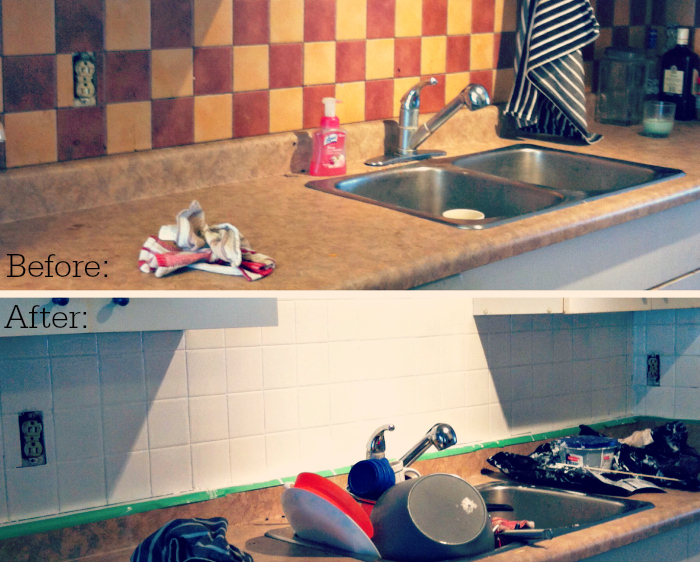
I moved into my house over 6 years ago and since the moment this place became a part of my family, I have been wanting to change the super ugly kitchen backsplash. I can’t even make it up and have no idea what the previous owners were thinking, but the tile was large squares of dirty orange and off yellow — with black grout. It wasn’t even placed correctly and there were spots that had two oranges together instead of a yellow and orange, plus it didn’t seem to matter how much I cleaned and scrubbed the kitchen, it never looked clean. And I haaaate that!
I don’t want to spend a lot on my kitchen until we can update the whole thing, so I thought I was destined to live with the ugly orange-yellow forever. When I discovered I could do a quick update that won’t cost an arm and a leg and can be done in one day, I was all about it. So I tried it and while it’s not totally completed yet (I need to put some outlet covers on and well, decorate a bit), I just knew I had to share it with you all.
Why?
You guys — the backsplash is now white! Whaaa? No more ugly orange-yellow and even with a sink full of dishes, it looks cleaner than it ever did before.
Jealous because I don’t have to stare at the ugly and it didn’t have to take months to do? Don’t worry — just follow the same tutorial I did and you’ll be doing the happy dance in your kitchen just like I am.
We used an epoxy-based paint so that it can be durable for a while (we have four kids, they like to mess things up) and the process was so simple. Really, I am kicking myself for not having done it sooner and can’t wait to see the whole thing finished!
You can get all the details on what products you need and how to do this yourself on House and Home
Photo credits: Devan McGuinness